The team of Volare flooring experts are here to give you a fast crash course on Laminate Flooring, one of Australia's most popular flooring choice.
Book a FREE online design consultation and see all the Laminate Flooring ranges and options.
Laminate Flooring
DIY Flooring
Flooring Information
The Ultimate Guide to Laminate Flooring
5 min read | Publish date: 2023
Key features and characteristics of laminate flooring:
Our flooring staff have noticed an increased popularity in laminate flooring this past year which isn't surprising given its versatility and wood look aesthetics without the hefty price tag. Laminate flooring is a type of synthetic flooring that has been widely used in residential and commercial settings as it's designed to replicate the appearance of natural materials like hardwood while offering several practical benefits.
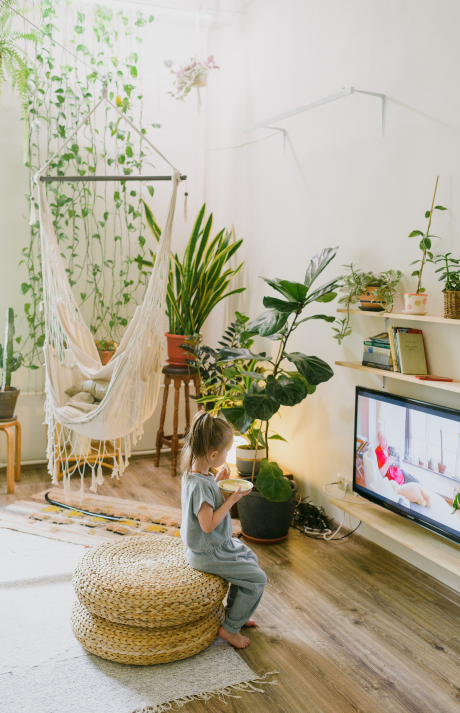
Overall, laminate flooring offers a durable, attractive, and cost-effective option for those seeking the appearance of natural materials without the high costs or maintenance requirements. As with any flooring, you will want the right woodgrain colour to suit your homes aesthetic so make sure you check out Volare's range of laminate flooring here.
Cleaning and Maintenance of Laminate Flooring
Cleaning laminate flooring requires some care to maintain its appearance and prevent damage. Here are some of the best ways to clean laminate flooring:
There are no secrets to maintaining your laminate flooring, just being attentive is the key to keeping your laminate flooring in excellent condition. By following the above tried and tested cleaning tips and taking care of your laminate flooring, you can enjoy its beauty and durability for many years to come.
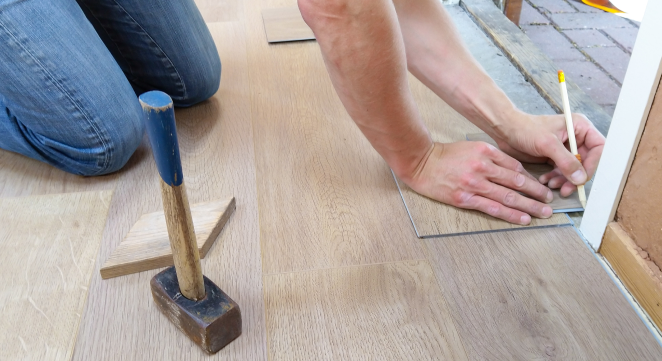
How to Lay Laminate Flooring
Laying laminate flooring is a DIY-friendly project that can significantly transform the look of a room. Proper installation is essential to ensure a durable and attractive result. Here's a step-by-step guide on how to lay laminate flooring:
Materials and Tools You'll Need:
Step 1: Prepare the Subfloor
Ensure the subfloor is clean, dry, and level. Remove any existing flooring materials, such as carpet or tiles, and check for any imperfections. Repair or level the subfloor as needed. If you are laying laminate on a concrete subfloor, consider using a plastic barrier to protect against moisture.
Step 2: Acclimate the Laminate Flooring
Allow the laminate flooring planks to acclimate to the room's temperature and humidity for at least 48 hours before installation. The best way to do this is by keeping the boxes of laminate planks unopened in the room where they will be installed.
Step 3: Install the Underlayment (if required)
Some laminate flooring comes with an underlayment pre-attached to the planks. If not, roll out the underlayment material over the entire subfloor. Trim it to fit the room's dimensions, and overlap seams by a few inches. Secure the underlayment in place using tape or adhesive as recommended by the manufacturer.
Step 4: Plan the Layout
Decide on the direction you want to lay the laminate planks. For a more natural look, consider laying them in the direction of the longest wall in a 50/50 offset pattern. Use spacers to create a small gap between the laminate flooring and the walls to allow for expansion.
Step 5: Start Laying the Laminate Planks
Begin laying the first row of laminate planks along the longest wall. Place the planks with the tongue side facing the wall. Use spacers to maintain the expansion gap. Trim the last plank in the row if necessary, leaving enough space for the expansion gap.
Step 6: Continue Installing Rows
Now one row is done you can move onto the next row. Connect the short end of each plank to the previous row using the tongue-and-groove system. Use a pull bar and tapping block to ensure a snug fit and avoid damaging the planks. Stagger the joints between adjacent rows to create a more stable and visually appealing installation.
Step 7: Trim Around Doorways and Obstacles
Measure and cut the laminate planks to fit around doorways, corners, and other obstacles using a utility knife or laminate cutter. Be sure to maintain the expansion gap around these areas. And as always, measure twice and cut once.
Step 8: Install Transition Pieces
Install transition pieces (such as T-moulding or thresholds) where the laminate flooring meets other types of flooring or at doorways. These transition pieces will help create a smooth transition between different flooring materials.
Step 9: Reinstall Baseboards and Molding
Once the laminate flooring is installed, reinstall the baseboards and any trim that was removed during the installation process. Use a pry bar to carefully remove the baseboards, and then secure them back in place with finishing nails.
Step 10: Clean and Enjoy
Finally, clean the laminate flooring to remove any dust or debris, and enjoy your newly installed laminate flooring! A quick dry mop and vacuum will be enough. Pop on some felt pads on the bottom of your furniture and your room will look stunning.
Keep in mind that this is a general guide and the specific installation instructions may vary depending on your home, space or project type. If you aren't sure then speak to our flooring team who can advise or refer to a professional floor layer in your area.
Start browsing Laminate Flooring online or in a Volare Flooring showroom
Volare Tiles + Flooring are committed to supplying Australians with top quality, attractive, modern and cost effective laminate flooring which is why you can access the range any time, anywhere:
Book a FREE online design consultation and see all the Laminate Flooring ranges and options.
We’ve launched a Free Online Design Consultation service
We're bringing the Volaré showroom to you! Speak with a design consultant via video chat to discuss your project, view flooring and tile ranges, styles, colours and organise samples to be delivered straight to your house.
Updated Showroom Hours
All our showrooms are still open and operational.
Geelong - M-F: 8.30am - 5.00pm | Sat: 9.00 am - 3.00pm | Online Consultation
Canberra - M-F: 8.00am - 5.00pm | Sat: 8.30 am - 1.00pm | Online Consultation
Richmond - M-F: 8.30am - 5.00pm | Sat: 10.00 am - 2.00pm | By Appointment Only (Browsers welcome) & Online Consultation
Volaré have implemented socially responsible measures to minimise the COVID-19 risk to all our staff and customers. With these safety measures in place we're proud to continue business and abide by the ongoing Government regulations.
If you can't visit a showroom, or aren't sure if you should, please find your local stores details in our outlets page and give us a call - we can take care of all your needs remotely.
Please keep yourself & your family safe during this unprecedented time.
Thank you,